- Step 1: Visit “My Profile”
- Step 2: Open Your Listing
- Step 3: Click “Manage Settings”
- Step 4: Click “Add/Edit Services”
- Step 5: Click “Add Service”
- Step 6: Name the Service
- Step 7: Click “Duration & Price”
- Step 8: Add Duration, Price, and Buffer Time
- Step 9: Choose Instant Booking Setting
- Step 10: Click “Group” If Needed
- Step 11: Click “Add Service” to Save
- Step 12: Click “Close”
- Step 13: Click “Manage Settings” Again
- Step 14: Click “Add/Edit Staff”
- Step 15: Edit the Staff Member
- Step 16: Click “Services”
- Step 17: Enable the New Service
- Step 18: Click “Save Changes”
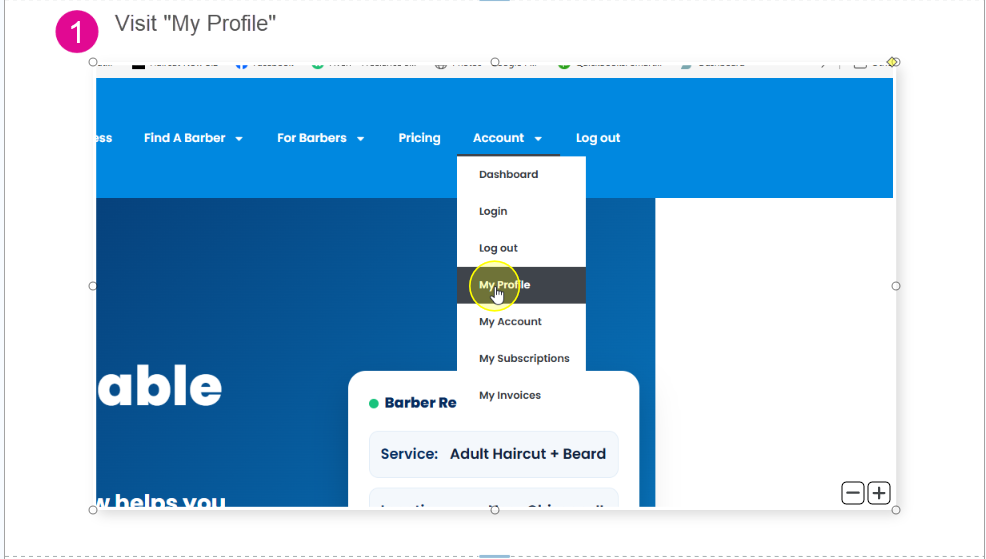
Step 1: Visit “My Profile” #
Log in to your Haircut Now account. From the top menu, hover over Account and click My Profile. This will take you to the public profile connected to your listing.
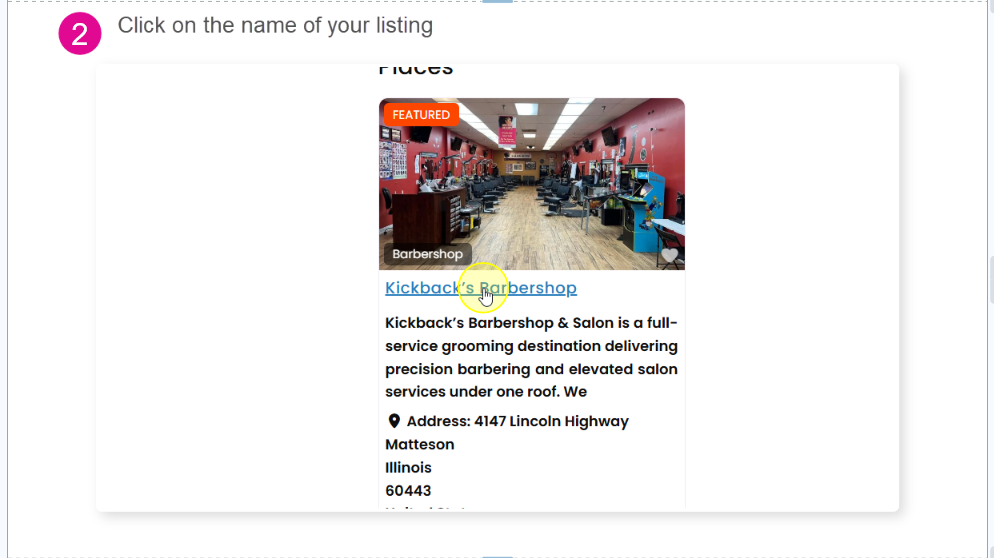
Step 2: Open Your Listing #
On your profile page, find your business listing and click the name of your listing. This opens the full listing page where your booking settings can be managed.
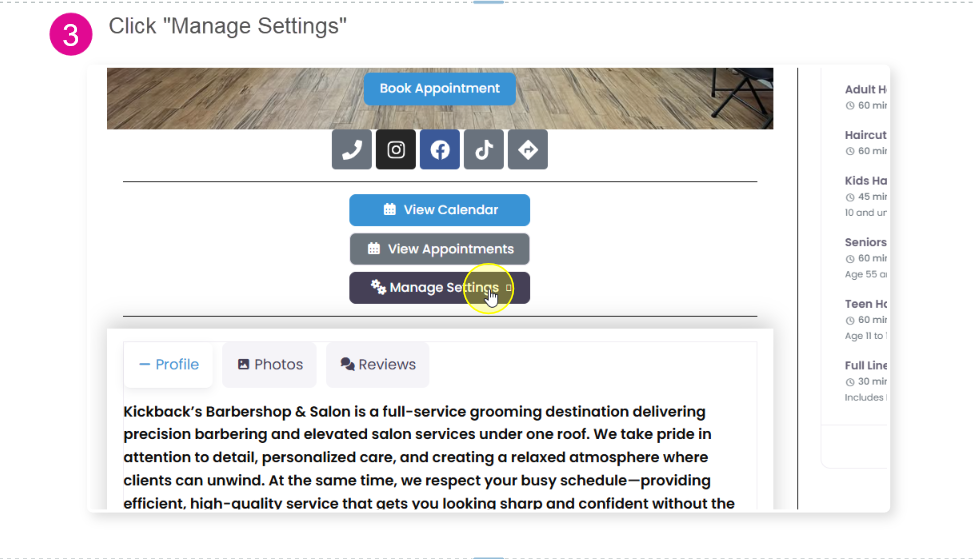
Step 3: Click “Manage Settings” #
Once your listing page opens, scroll to the booking section and click Manage Settings. This menu gives you access to your appointment, service, staff, and booking options.
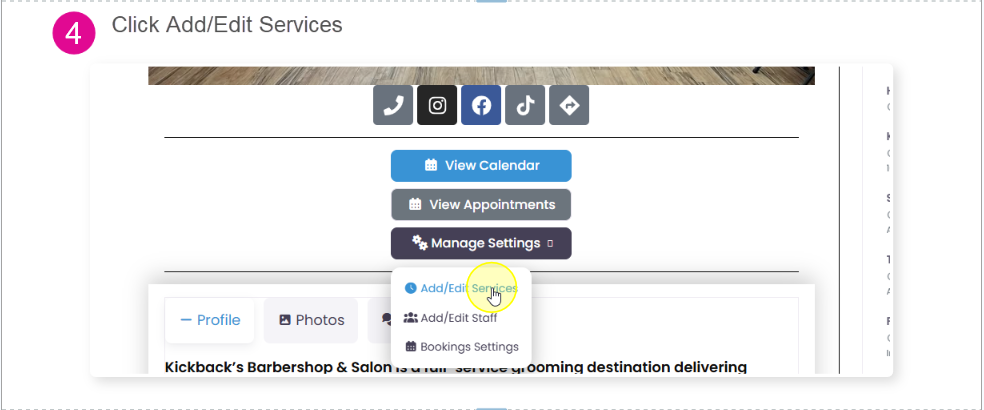
Step 4: Click “Add/Edit Services” #
From the Manage Settings dropdown menu, click Add/Edit Services. This is where you can create new services or edit existing services already connected to your listing.
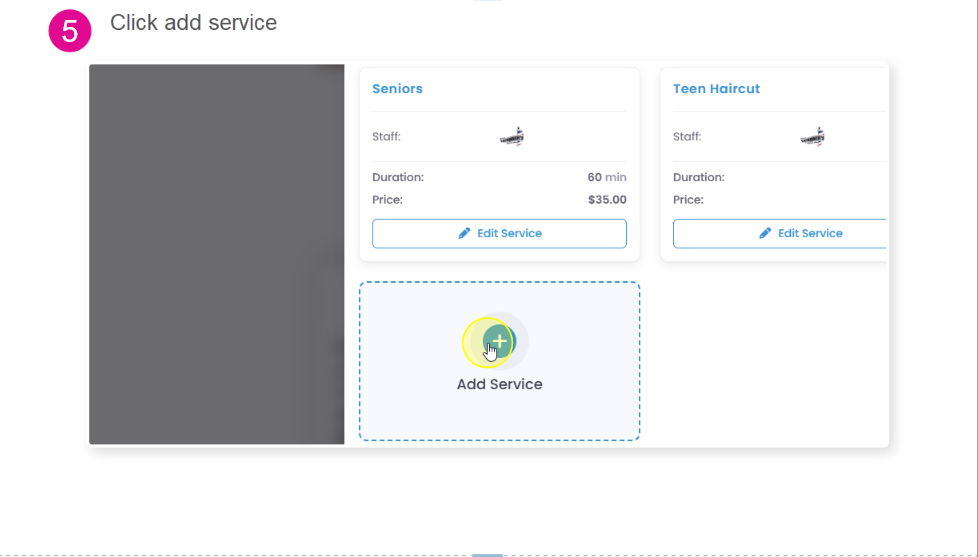
Step 5: Click “Add Service” #
On the services page, click the Add Service button. This will open the service setup window where you can enter the service name, price, duration, and booking rules.
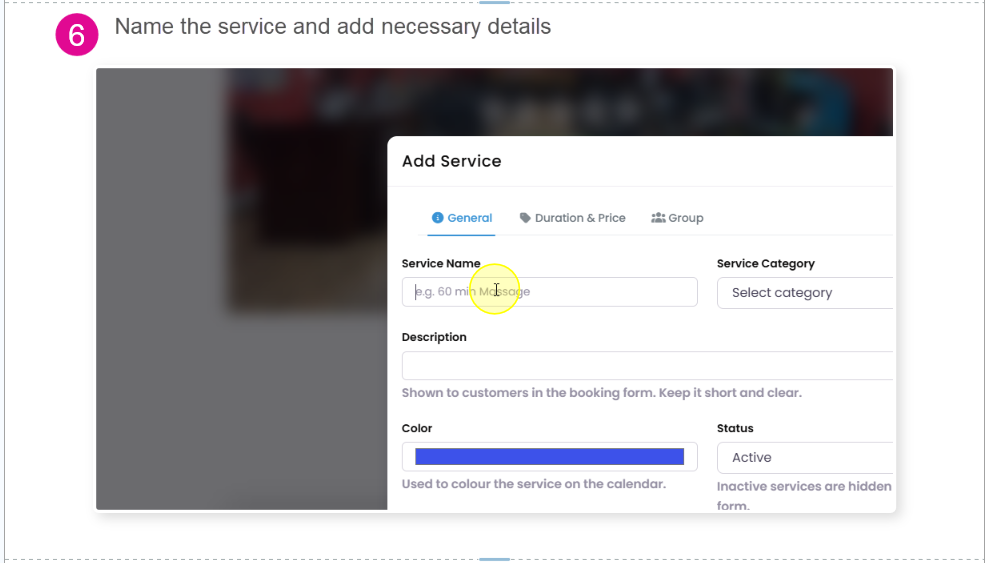
Step 6: Name the Service #
Enter the name of the service you want customers to book. For example, you can add services such as Adult Haircut, Kids Haircut, Line Up, Haircut & Beard, or any other service you offer.
You can also add a short description so customers understand what is included.
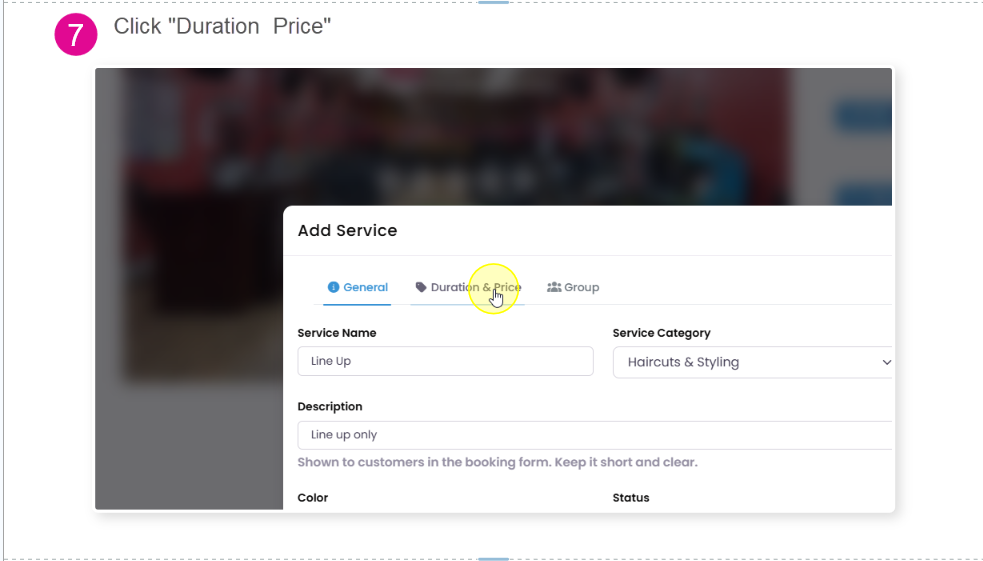
Step 7: Click “Duration & Price” #
After entering the basic service details, click the Duration & Price tab. This section controls how long the service takes, how much it costs, and whether any buffer time is needed.
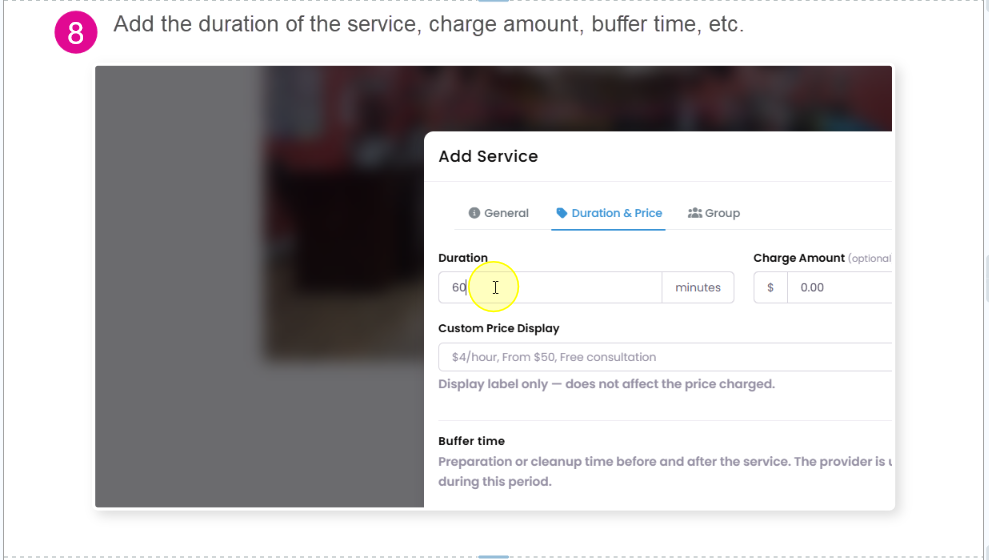
Step 8: Add Duration, Price, and Buffer Time #
Enter the service duration in minutes and add the charge amount. You can also add buffer time before or after the service if you need extra time for cleanup, preparation, or setup between appointments.
Make sure the duration and price are accurate because customers will see this information when booking.
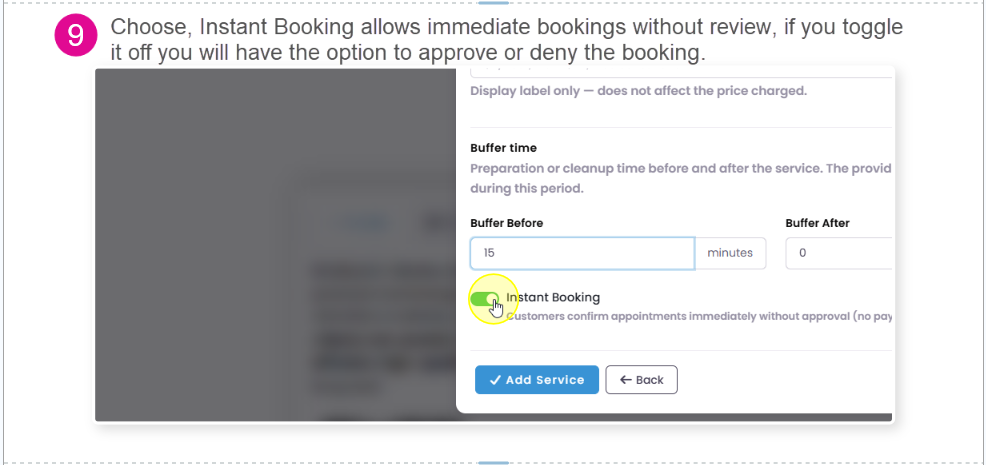
Step 9: Choose Instant Booking Setting #
Decide whether you want to allow Instant Booking for this service.
When Instant Booking is turned on, customers can book immediately without waiting for approval. When it is turned off, you will have the option to review, approve, or deny the booking request.
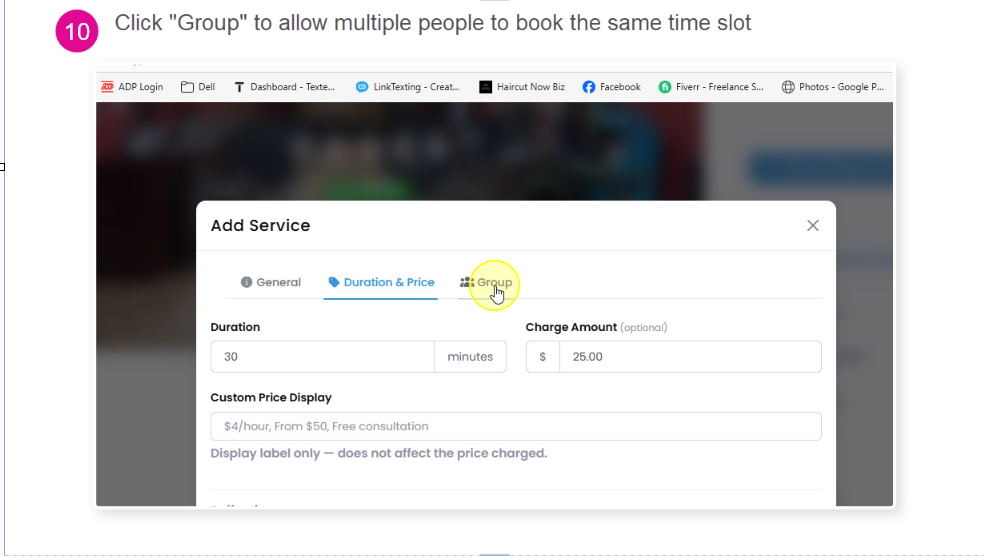
Step 10: Click “Group” If Needed #
Click the Group tab if you want multiple customers to book the same service during the same time slot.
This is useful for services, classes, events, or situations where more than one person can be accepted at the same appointment time. For normal one-on-one barber appointments, you can usually leave this section unchanged.
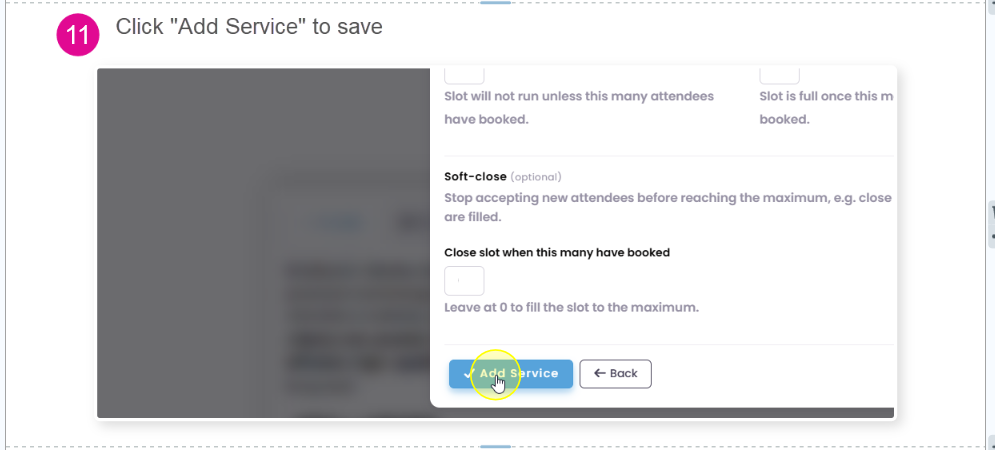
Step 11: Click “Add Service” to Save #
After all service details are complete, click Add Service to save the new service. The service will now be added to your list of available booking options.
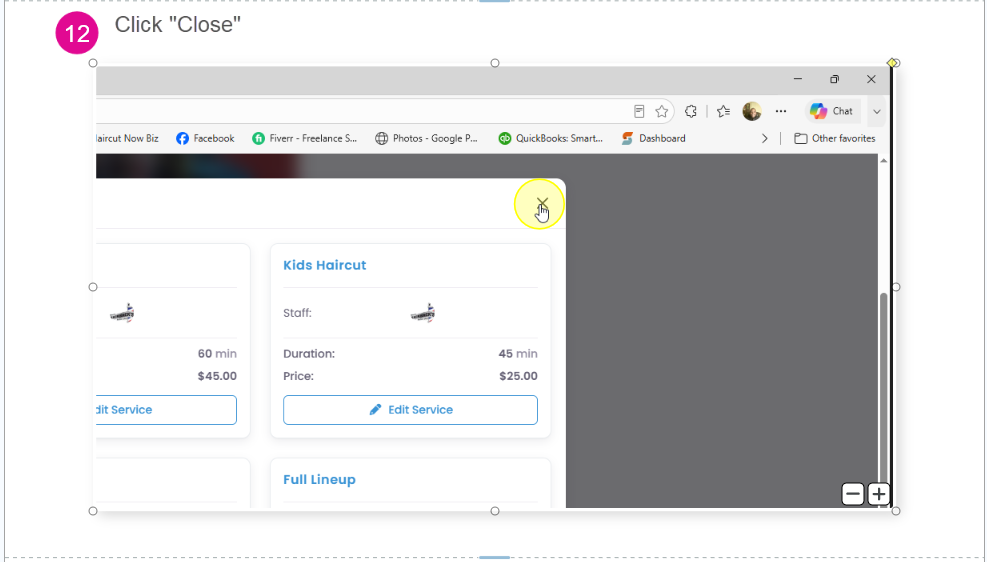
Step 12: Click “Close” #
Once the service has been saved, click Close to exit the service setup window and return to your listing page.
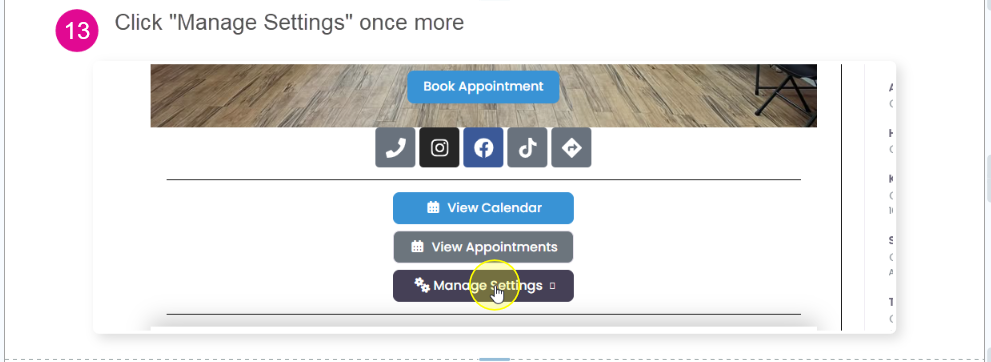
Step 13: Click “Manage Settings” Again #
Return to the booking settings by clicking Manage Settings again. The next step is to make sure the new service is assigned to the correct staff member.
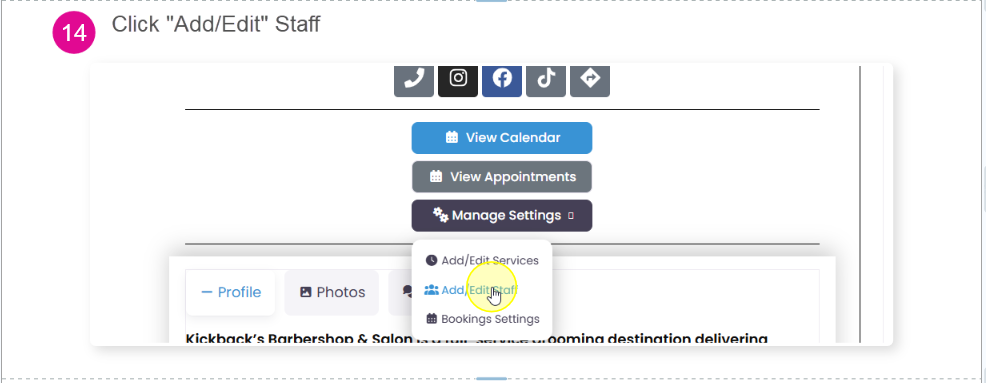
Step 14: Click “Add/Edit Staff” #
From the Manage Settings dropdown menu, click Add/Edit Staff. Services must be connected to a staff member before customers can book them.
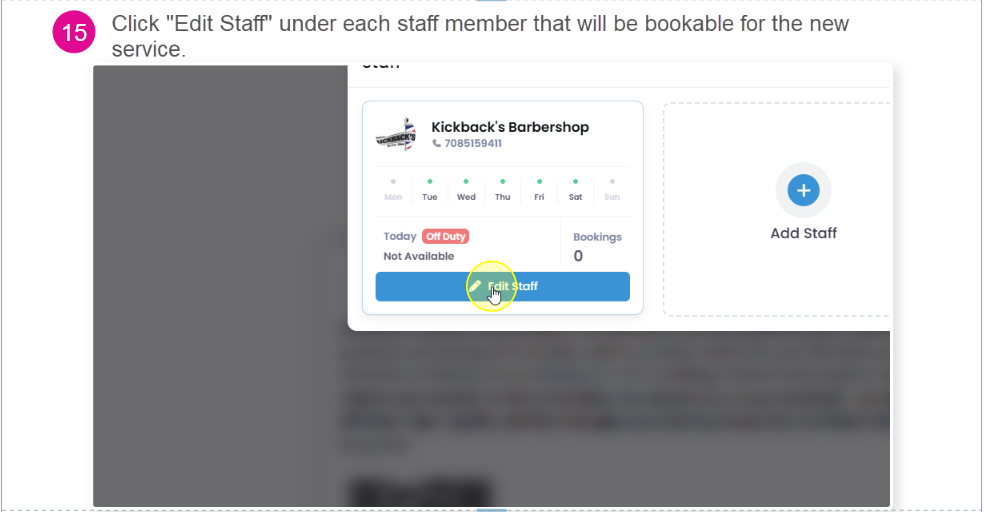
Step 15: Edit the Staff Member #
Find the staff member who should be bookable for the new service and click Edit Staff.
If more than one staff member offers the service, you will need to repeat these steps for each staff member.
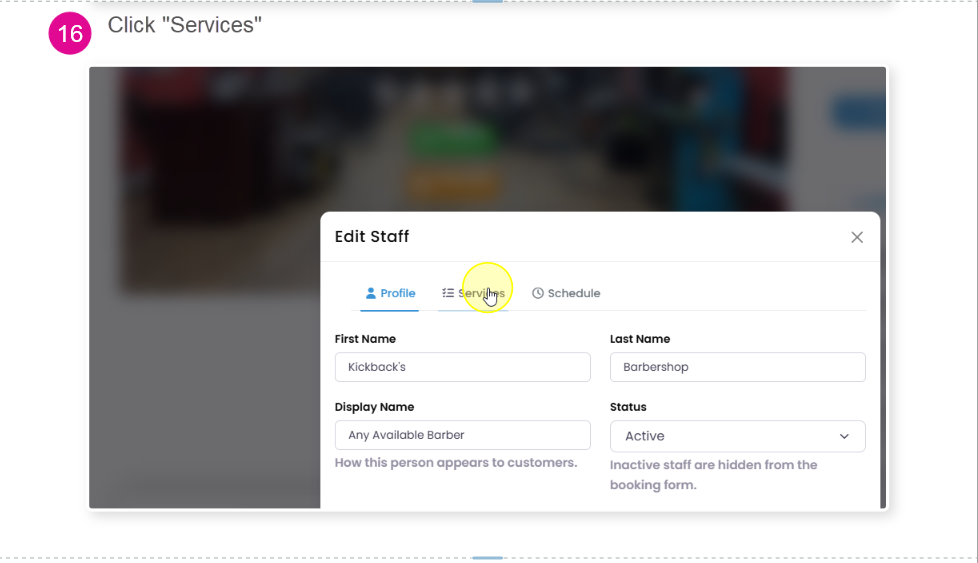
Step 16: Click “Services” #
Inside the staff editor, click the Services tab. This section controls which services that staff member can perform.
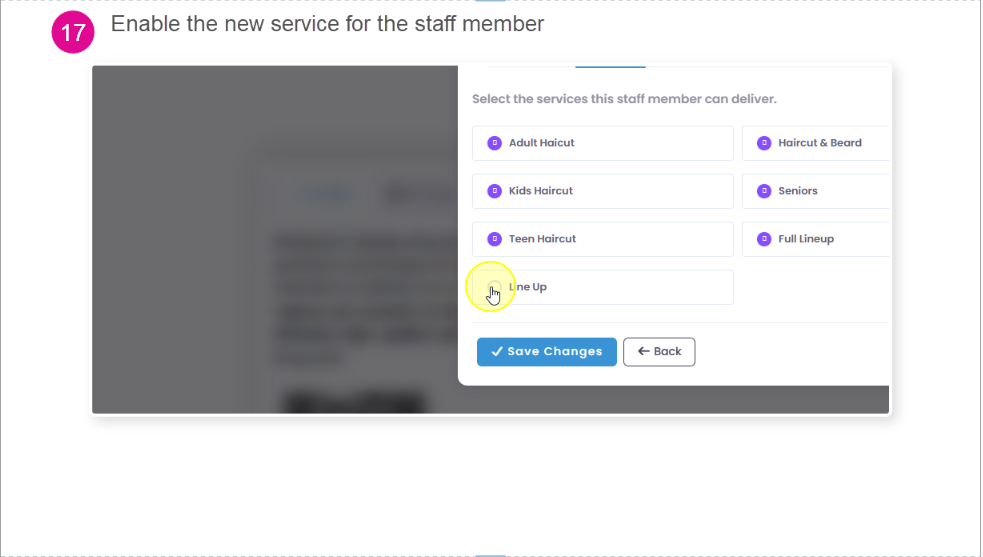
Step 17: Enable the New Service #
Find the new service you added and select it for the staff member. This tells the booking system that this staff member is available to perform that service.
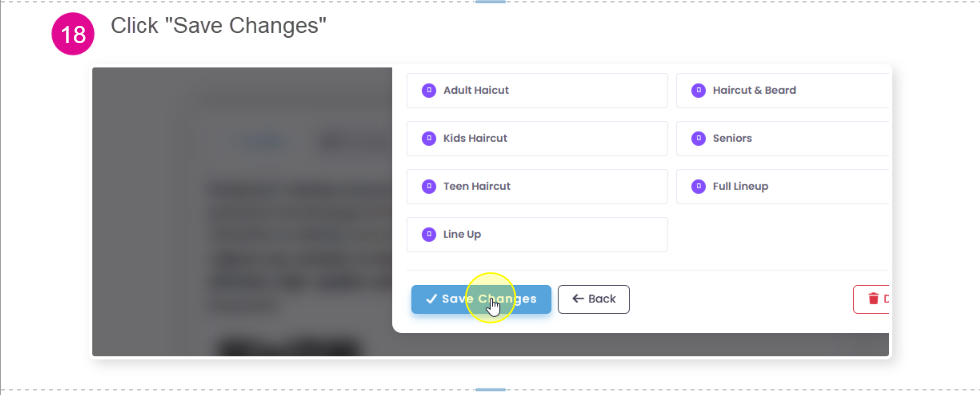
Step 18: Click “Save Changes” #
Click Save Changes to update the staff member’s service settings. Your new service is now connected to the staff member and can appear as a bookable option on your Haircut Now listing.